Submitting Jobs from your Spreadsheet with the Denim Zapier Integration
Last updated: July 10, 2026
Prerequisites
Get ready to set up your first Zapier automation (Zap) by following these steps:
Generate your API Key from Denim (Click here to learn how to get your API Key)
Activate a Zapier subscription
Click here to view the Denim integration
Ensure your load management spreadsheet contains all of the required information for importing jobs to Denim. Review this article for a detailed list.
Supported ways to input your Jobs to Denim via Zapier include: Google Sheets, Excel 365, Airtable, Hubspot and many others. Check out the full list of Zapier integrations at: Zapier App Directory.
Once you have created your Zapier account and set up your source to send Jobs to Denim, you are ready to build the Zapier workflow that will automatically import jobs.
Setting up your Zap to Submit Jobs
The following guide will show you how to set up this Zap in Google Sheets. If you are using a different app for load management, this guide can still be used to give you an idea of how the Zap works. Zaps set up with other apps will follow the same pattern, with slightly different event and field names.
Your automation will consist of multiple steps in Zapier. Each one appears as its own module on the Zapier UI. After each step, click the plus sign to add the next step.
Step 1: Trigger Event
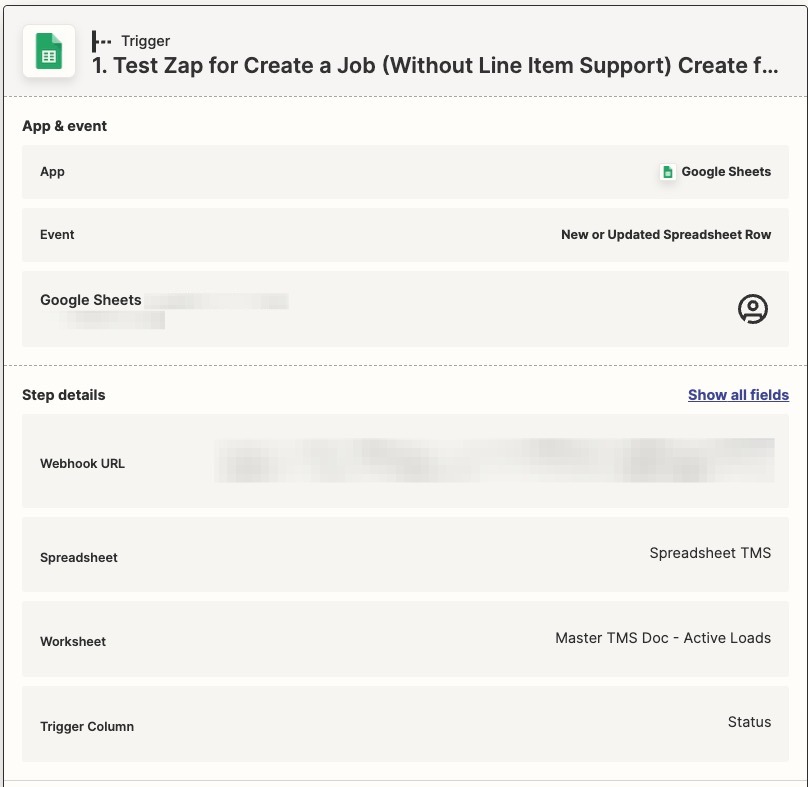
Navigate to www.zapier.com, log in, and click the Create Zap button. Configure the Trigger event:
App & event
App: Google Sheets
Event: New or Updated Spreadsheet Row
Continue and set up the source
Account: Select the Google account your load management spreadsheet is associated with
Spreadsheet: Select or enter the name of the spreadsheet file
Worksheet: If your spreadsheet has multiple tabs/worksheets, be sure to select the one you'll be using to manage load/invoice status.
Trigger Column: You will need a column to manage the status of the loads. We suggest naming this column "Status." Updating this column is what will trigger Zapier to import your job to Denim. Select this column.
Note: It's very import to select the correct column here, and only the column you will use to manage status. If you leave this field on the default of "Any Row," Zapier will attempt to submit a job any time you update any job details, when may not be ready to submit it.
If you select a single column but do not properly map that column from your spreadsheet to Zapier, it will not capture your status changes and will not submit jobs.
Test and continue
Step 2: Filter by Status
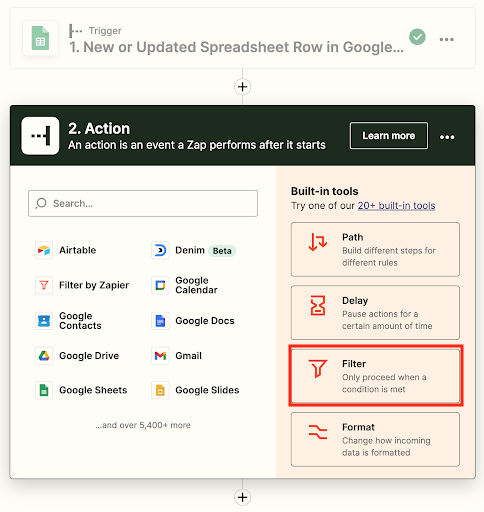
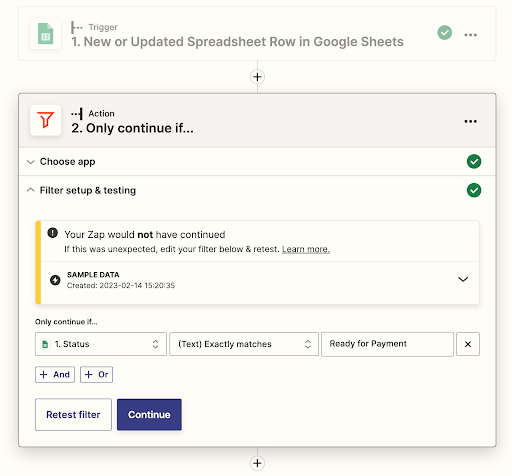
In this step create a Zapier filter to only select jobs where you have updated the status to "Ready for Payment."
App: Zapier Filter, under “Built-in tools”
Only continue If:
Select and map the Status column from Google Sheets
Enter the phrase you will use to mark a job ready to submit to Denim. We use "Ready for Payment."
Click the plus button to continue to Step 3.
Step 3: Find Customer in Denim
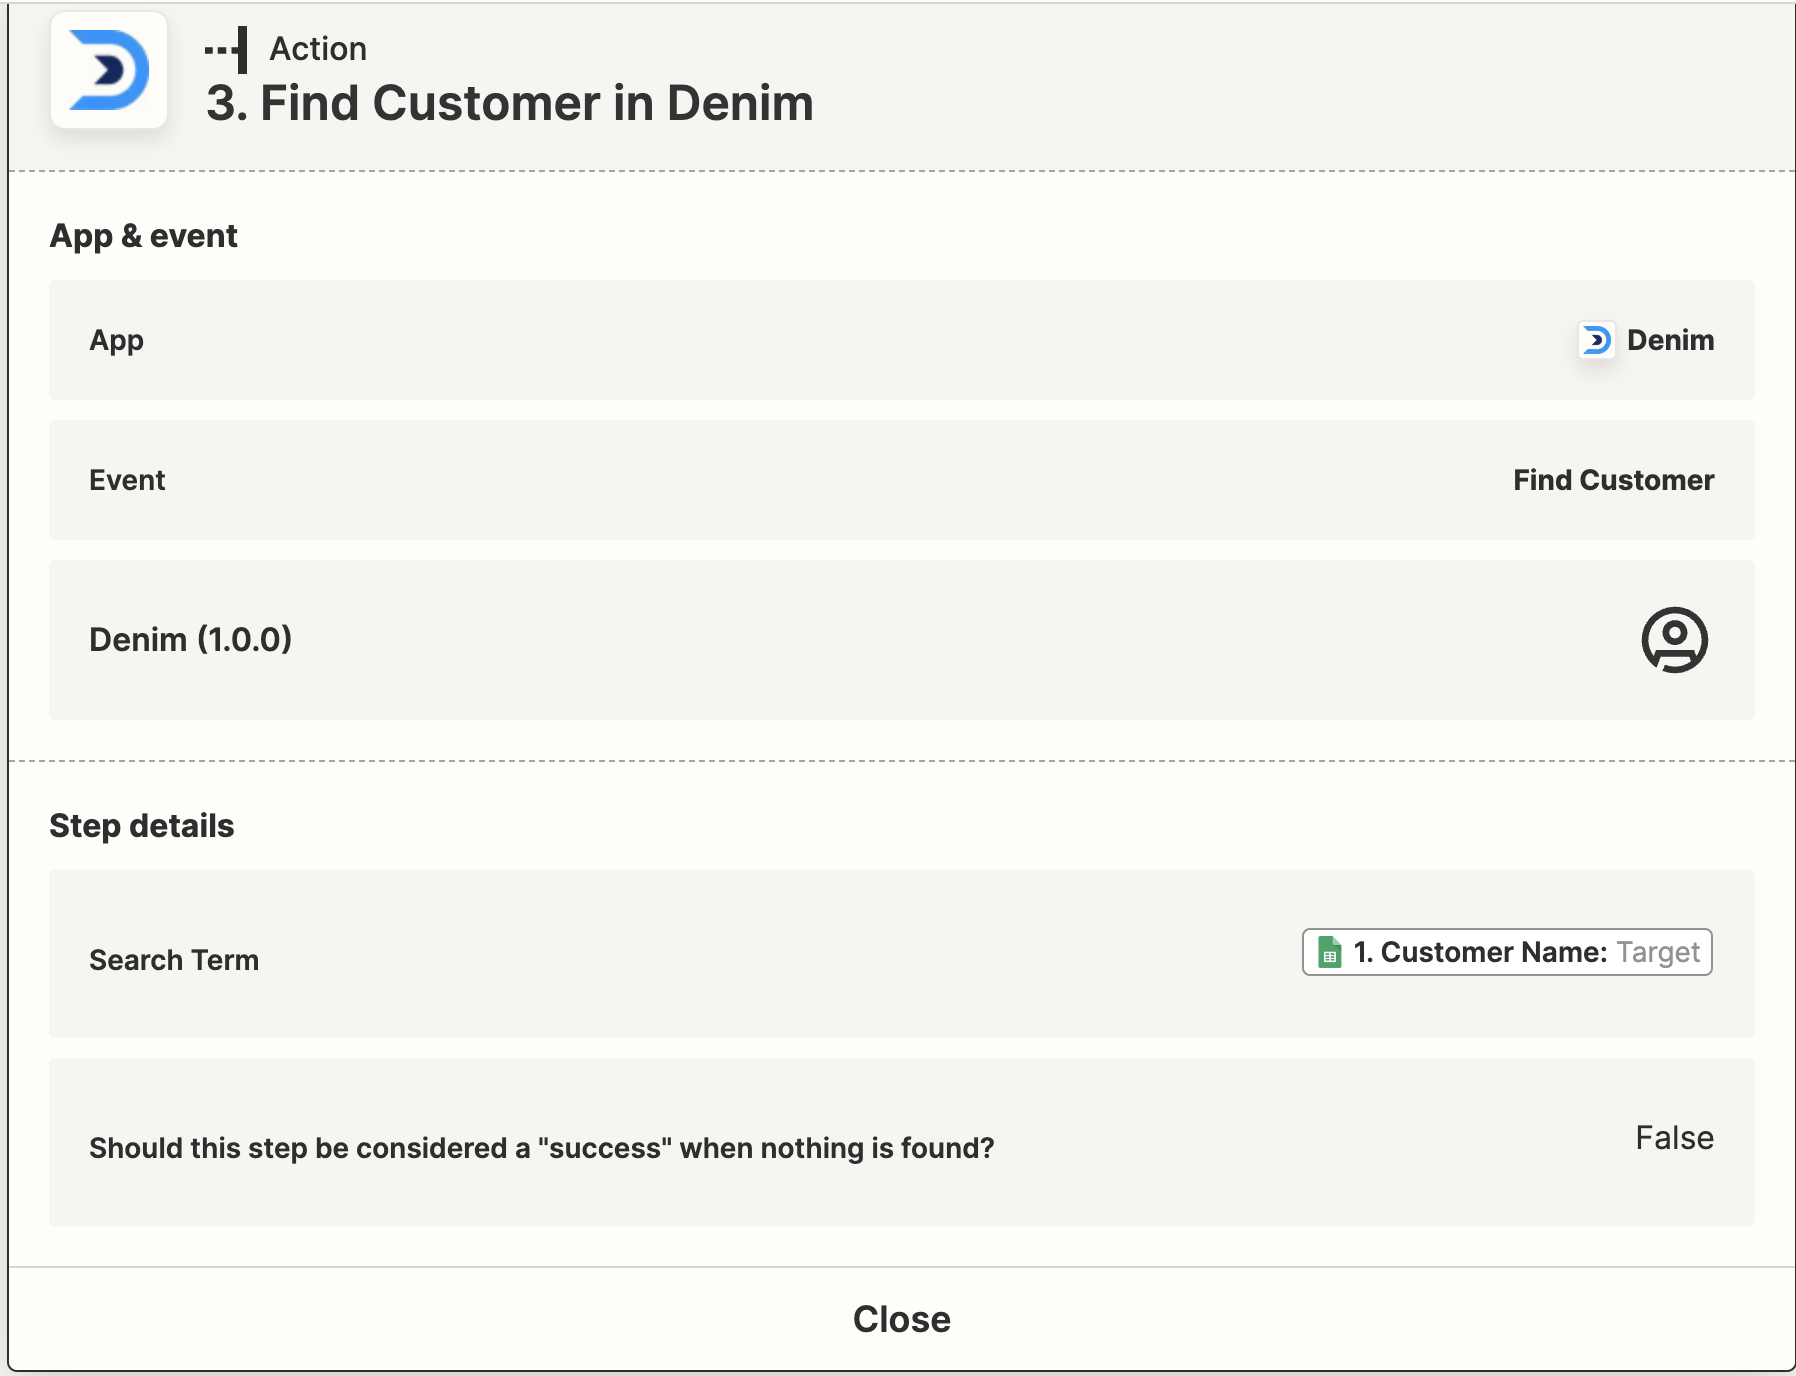
App & event
App: Denim
Event: Find Customer in the Denim app events
Choose Account
Enter your Denim credentials to link your account. This step is required so that Denim and Zapier can communicate to select the right customer from your account.
Set up action (aka Step Details)
Search Term select the column on your spreadsheet that contains your customer (debtor) name.
Should this step be considered a “success” when nothing is found?”: Select No/False so that Zapier doesn't attempt to enter a job if a customer is not found.
Continue and test
Click the plus button to continue to Step 4
Step 4: Find Contractor in Denim
App & event
App: Denim
Event: Find Contractor in the Denim app events
Choose Account
Choose your Denim account
Set up action (aka Step Details)
Search Term select the column on your spreadsheet that contains your contractor/carrier name.
Should this step be considered a “success” when nothing is found?”: Select No/False so that Zapier doesn't attempt to enter a job if a contractor is not found.
Continue and test
Click the plus button to continue to Step 5
Step 5: Create a Job (Without Line Item Support) in Denim
This step maps a number of fields from your spreadsheet into your Zapier automation so that we can fill in the details of the job.
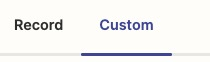
Note: Beginning with this step and for the remainder of your Zap automation, any time you are selecting a Denim event, be sure you select the Custom toggle, then the appropriate property. Selecting the Record object will define the Zap specifically to your test record. Selecting the Custom option will allow the Zap to search dynamically based on the data specific to each job.
Choose App & event
App: Denim
Event: Create a Job (Without Line Item Support)
Set up action
Job ID - Select the column in Sheets where you store your Job reference number
Description - Select the column in Sheets where you store your description or notes
Is Factored? - Select the column in Sheets where you mark the job as factored or not.
This setting will apply to all jobs created using this integration.
# of Documents to attach - this should be 3 for most users. Once you have entered 3, click "Refresh Fields" to generate the document detail sections.
The documents are:
Document 1
Subtype: Purchase_order
Type: billing_paperwork
URL: Map to the field in your spreadsheet that includes a link to your customer's rate confirmation
For more info on document URLs check this help article on setting up your spreadsheet.
Document 2
Subtype: Proof_of_work
Type: billing_paperwork
URL: Map to the field in your spreadsheet that includes a link to your contractor's proof of delivery document.
Document 3
Subtype: invoice
Type: supporting_paperwork
URL: Map to the field in your spreadsheet that includes a link to your contractor's invoice document.
# of Obligations. This should be 2 for most users. Once you have entered 2, click "Refresh Fields" to generate the obligation detail sections. The obligations are:
Obligation 1
Type: receivable
Client Payee Relationship ID: (leave blank)
Client Debtor Relationship ID: Custom > Find Customer in Denim > Client Debtor Relationship Id
Due Date: Map to the column in your Sheet that contains the due date (aka Collection date)
Obligation Date: Map to the column in your Sheet that contains the invoice date
Reference Number: Map to the column in your Sheet that contains the customer's PO number
Subtype: primary
Total Amount: This is the amount Denim will bill your customer.
NOTE: Denim expects amounts in cents, without decimals, so if your spreadsheet stores this value in dollars and cents (ex. $1000.00), multiply this amount by 100 in Zapier (see example below)
Airtable users: We recommend creating an additional column that converts the Customer Amount into cents as an integer, and mapping the additional column to the Customer Amount in Zapier. Set up the field as a “Formula” and multiply the Customer Amount field by 100 (see example below).
Obligation 2
Type: payable
Client Payee Relationship ID: Custom > Find Contractor in Denim > Client Payee Relationship Id
Client Debtor Relationship ID: (leave blank)
Due Date: Map to the column in your Sheet that contains the Contractor Pay Date. Denim will pay your contractor on this date.
Obligation Date: Map to the column in your Sheet that contains the contractor's invoice date
Reference Number: map to the column in your Sheet that contains the contractor's invoice number
Subtype: primary
Total Amount: This is the amount Denim will pay your contractor.
NOTE: Denim expects amounts in cents, without decimals, so if your spreadsheet stores this value in dollars and cents (ex. $1000.00), multiply this amount by 100 in Zapier (see example below)
Airtable users: We recommend creating an additional column that converts the Carrier Amount into cents as an integer, and mapping the additional column to the Carrier Amount in Zapier. Set up the field as a “Formula” and multiply the Carrier Amount field by 100.
Continue and test
Click the plus button to continue to Step 6
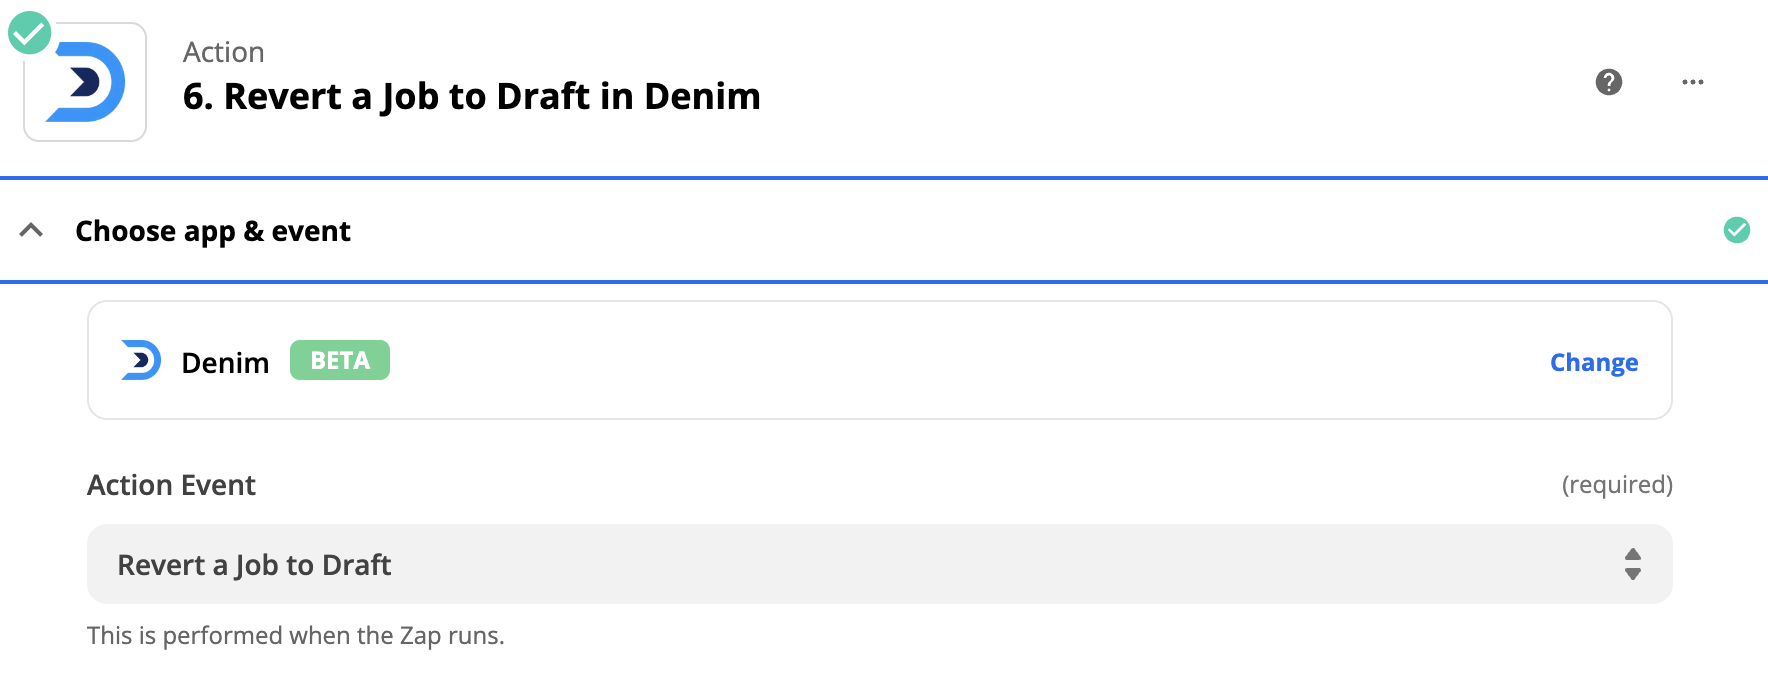
Step 6: Revert a Job to Draft in Denim (optional)
This step saves the imported jobs as drafts with Denim in case you'd like to review them or add additional info or documents. If you'd prefer your jobs to be submitted directly for funding, do not include this step.
App & event:
App: Denim
Event: Revert a Job to Draft
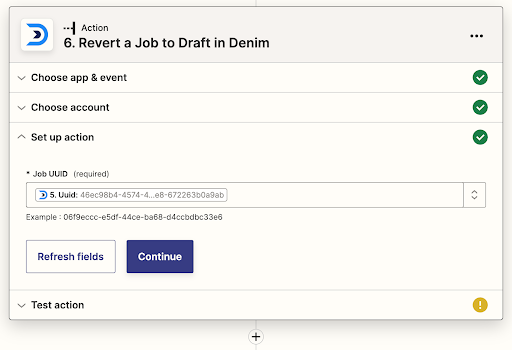
Choose Account: Choose your Denim account or login again if required
Set up Action: Locate and select the Job UUID property: Custom > Create a Job (Without Line Item Support) in Denim > 5.Uuid
Step 7: Update Spreadsheet Row
This step will enter the Denim UUID into your spreadsheet. The Denim UUID is the unique job identifier from our database. The UUID may be used in other Zaps if you choose to create additional automations for job status updates. See this help article for more detail on building a status update Zap.
Choose app & event:
App: Google Sheets
Event: Updated Spreadsheet Row
Choose account: select the Google account your spreadsheet is associated with
Set up action:
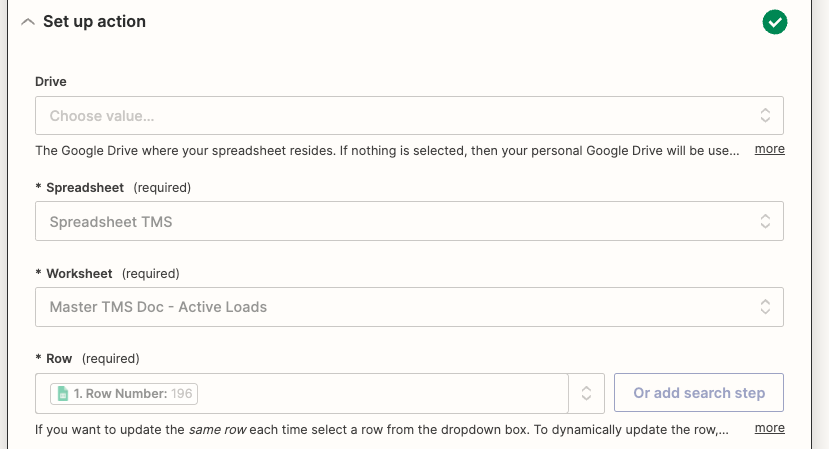
Spreadsheet: Select or enter the name of the spreadsheet TMS file
Worksheet: If your spreadsheet has multiple tabs/worksheets, be sure to select the one you'll be using to manage load/invoice status.
Row: Custom > select the row from step 1 (see example below)
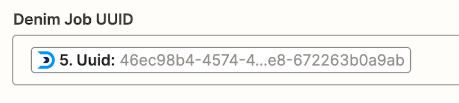
Denim Job UUID: Custom > Create a Job (Without Line Item Support) in Denim > 5.Uuid
Note: You will have fields matching all of the columns from your Google Sheet - you do not need to fill or map any of these except the Denim UUID field.
FAQ/Troubleshooting:
I'm updating my jobs to "ready to submit" but not seeing the jobs in my Denim dashboard.
Jobs may take up to 15 minutes to appear in your Denim dashboard after you update them to "Ready to Submit" in your spreadsheet.
Ensure your Trigger, Step 1 in Zapier, is properly mapped with the correct folder location, file name, sheet name, and trigger column.
I entered the wrong API Key in Zapier
Go to www.zapier.com/dashboard
Choose the My Apps item on the left-hand nav
Select the Denim app and delete it, then re-add
My Denim Job UUID field isn’t updating properly
Be sure that the field type is formatted correctly. The Denim Job UUID field needs to be formatted as a text field because it’s an alpha-numeric code.
Some of my jobs failed on the customer or contractor step
The Zap looks for existing customer and contractor relationships in your Denim account. If you have a new customer or contractor, add the relationship in your Denim dashboard before attempting to submit the job via your spreadsheet.
I need to resend a job that failed to transmit to Denim
Delete the “Ready for Payment” text in your Status column, then re-add it.
I want to add more than 3 documents to my job
When building your Zap, enter the number of document fields you want to use, then map each one to a corresponding column in your spreadsheet
My integration was working, but now it’s failing, and/or some data is not coming through to Denim in the right fields.
Inserting new columns to your spreadsheet may adjust how information is mapped in your Zap. If you’ve recently inserted a column into your spreadsheet, check your Zap to make sure the fields are still mapped correctly.
Some of my jobs have two contractors/payees
When building your Create Job in Denim step, enter 3 for the number of obligations.
You can map two different contractor/payee obligations on your Zap, but if some jobs only have one contractor the Zap will still work.
Need help setting up or troubleshooting your Zapier automation? Contact us at product@denim.com for further assistance.